FrankenPaper Head-in-a-Box Illusion 1.0 Paper Model Instructions Step 4
Download the patterns here:
[Nose] [Eyes] [Hair] [Frame 1] [Frame 2] [Frame Template] [Box Template]Tip: To make the model full size just save the image and print it from a paint program. If you prefer a smaller size then just print it from your browser.
Step 4: Giving FrankenPaper a home.
( Click on images for larger views )
<<Main Menu - Step [1] [2] [3] [4]Build the Frame: Now it is time to build a corrugated cardboard box for Frank to live in.
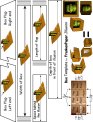
Since this part is about building a box out of cardboard and my usual forte is paper it seems to have caused some confusion. Let me try to clear things up a bit. Keep in mind the piece of cardboard we need is larger than a piece of paper. So we need to build something out of paper that we can use to transfer our sizes to the cardboard. First print out the frame template.
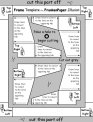
[Frame Template]
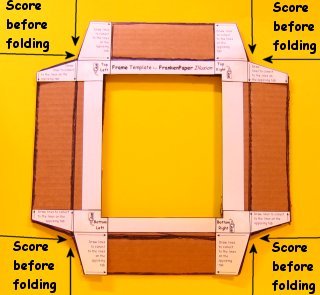
Now this is a Frame so do not cut through the sides (well I suppose you could and then tape it back together). Cut off the gray area at the top and bottom. Then cut out the pieces in the middle. There are 4 pieces in the middle that we want to glue to the corners of the frame. Once the template is assembled you will notice 2 sets of arrows on each tab that point to the opposite end. One is for the outer edge cut line, and the other is for the fold lines. Trace the center of the frame onto the cardboard, trace the corners. Now draw connecting lines between the arrows. Cut it our along the outer edges. Score and Fold from corner to corner before cutting out the middle of the cardboard Frame.
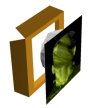
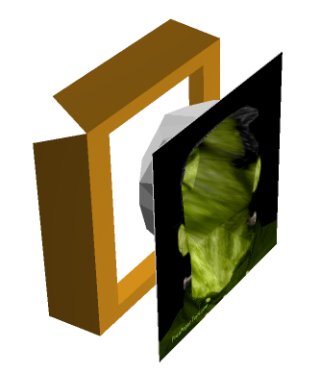
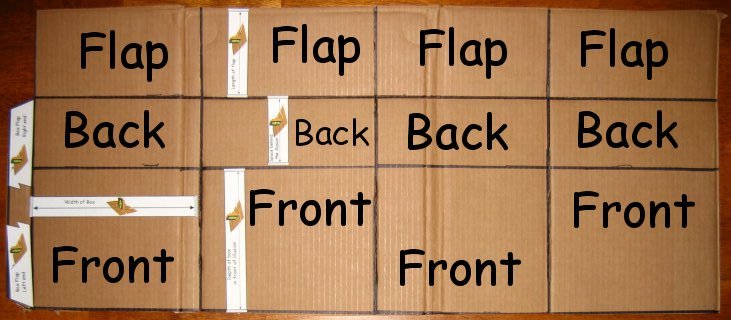
Glue the model into the Frame.
It is OK if part of the neck is covered by the frame.Build the Box:
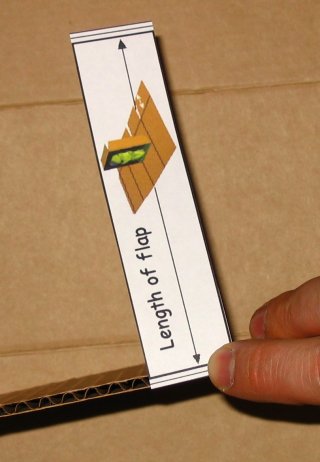
Again we can not print a template large enough for the entire box, so I have made a number of little rulers to measure with.
[Box Template]
I think corrugated cardboard boxes work well. But since cardboard comes in so many thickness', that I have added lines to so you can customize the templates to fit your cardboard. The reason that I have chosen to take this approach is because the model will be a different size if you print from the browser then if you download it and print it at 100% (or some other size). This model and these templates should work at almost any scale. Just remember to print out the model and the templates at the scale.
When you find a template piece with lines at the ends, cut both ends to match the thickness of your cardboard.
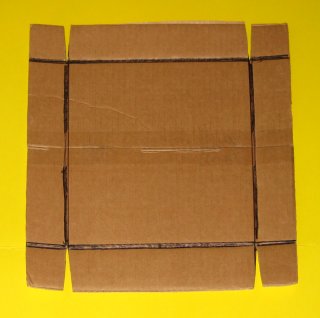
Lay out the template pieces and draw the lines.
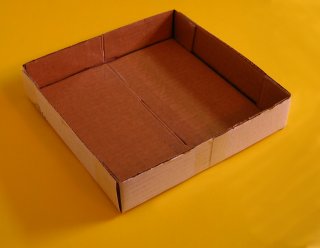
Cut between the flaps. Score between the box sides.

Line up the front of the model on the line between the front and the back. Glue the frame in place.
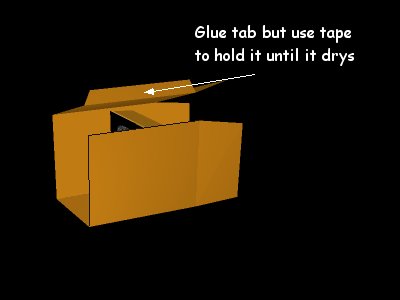
Glue each side as you fold the box around the frame. I use tape on the long flap to hold it while the glue dries.
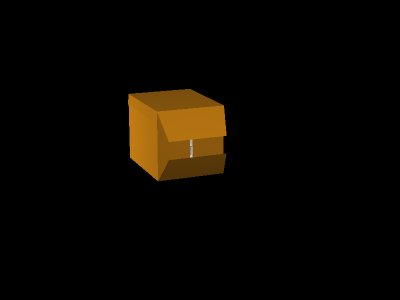
Fold glue and tape the flaps on the back.
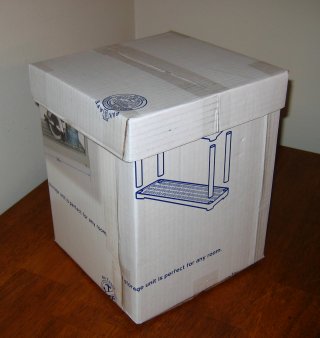
Set him on a shelf at or near eye level and walk back and forth. He will watch you as you pass!Step 4: Topping the Box
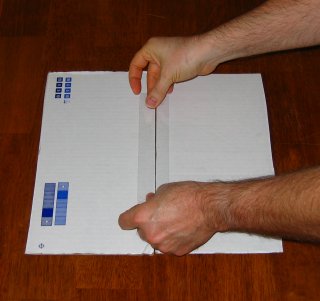
I was out of matching cardboard so I taped two leftover box flaps to make the top.
Trace the outline of the box onto the top.
Add the width of the cardboard.
Extend the lines to the end of the cardboard.
Cut two "V" shaped notches at the top and bottom.
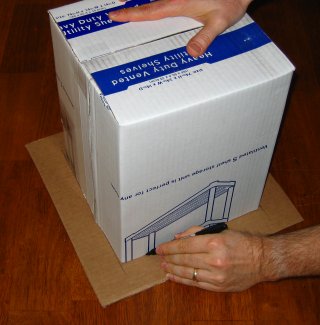
Fold, Glue and Tape.

Put the top on to the Box and construction is finished.Makes a great Halloween decoration or cool room decor!
<<Main Menu - Step [1] [2] [3] [4]

![]()